
Table of Contents
Step 1: Log In #
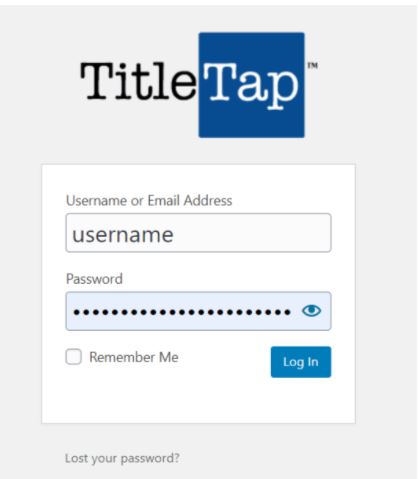
Log in to the back end of your site using the login link sent to you by TitlTap. It is usually a link with your url/login/, like this: https://yoursite.com/login/
Enter your user name/email address and your password, then click “Log In” – if you have forgotten your password, you can click the “Lost your password” link at the bottom to have it reset.
Step 2: Add New Post #
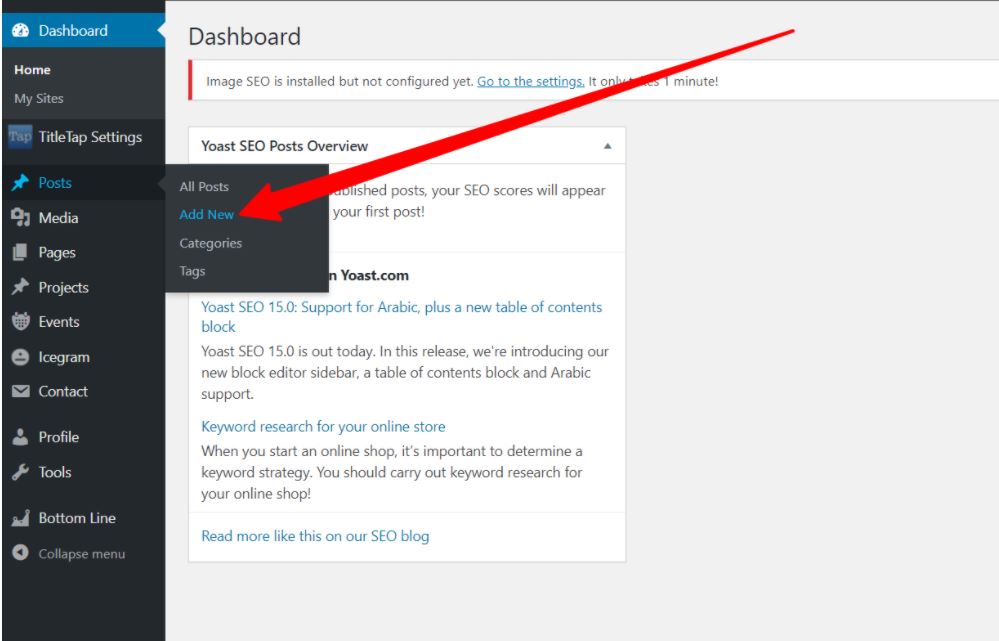
On the left-hand side, hover over “Posts” until the secondary menu comes up, then click on “Add New”.
Step 3: Create and design your post #
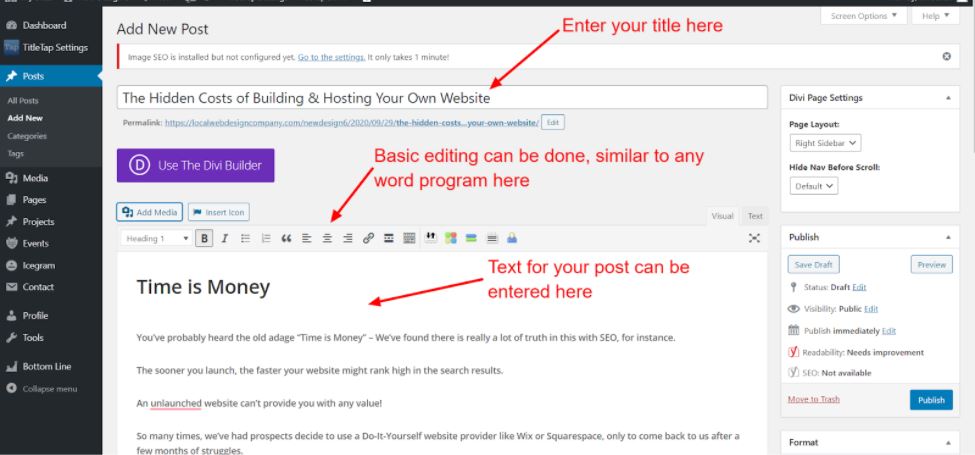
Enter your title and text, as shown below.
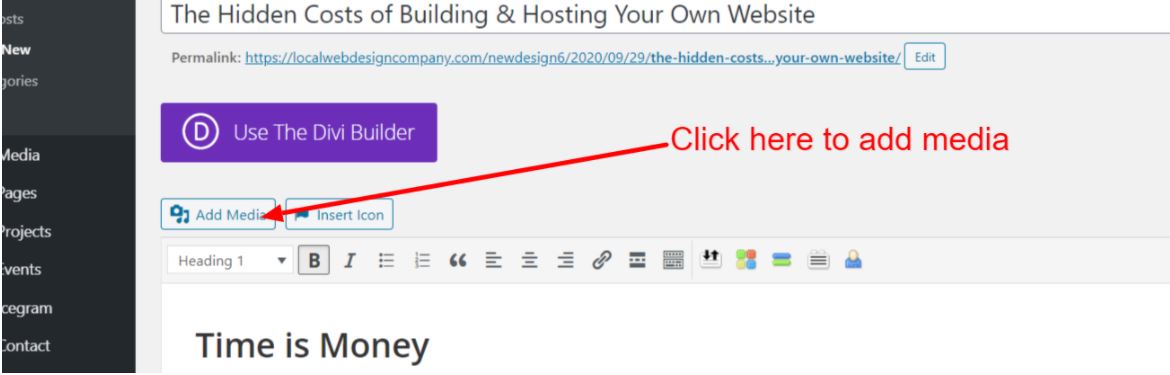
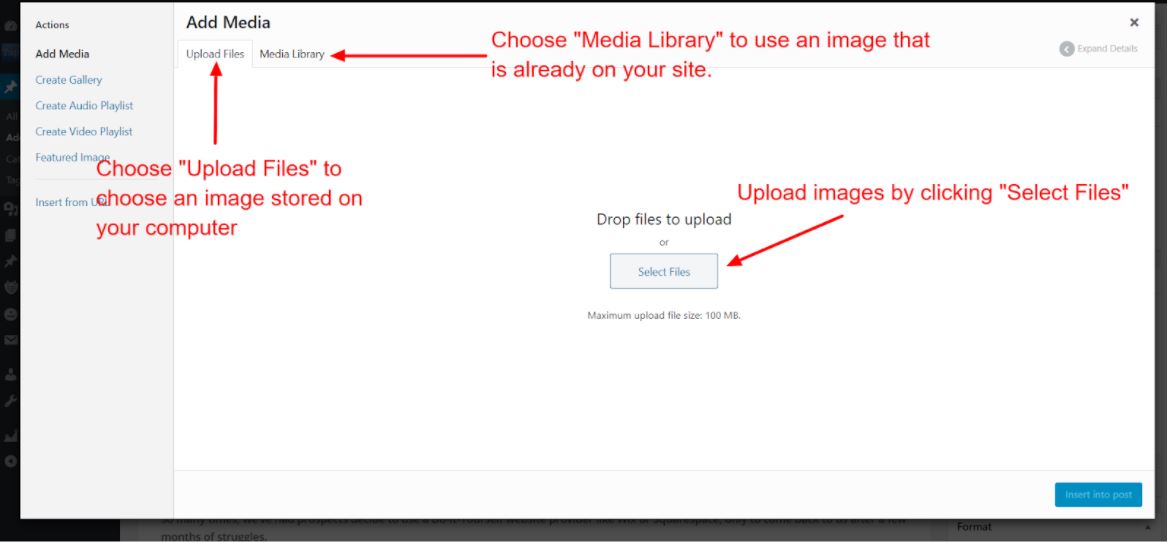
If you’d like to add media/images, you can click on “Add Media”
You can either upload new media, or choose from your current media library.
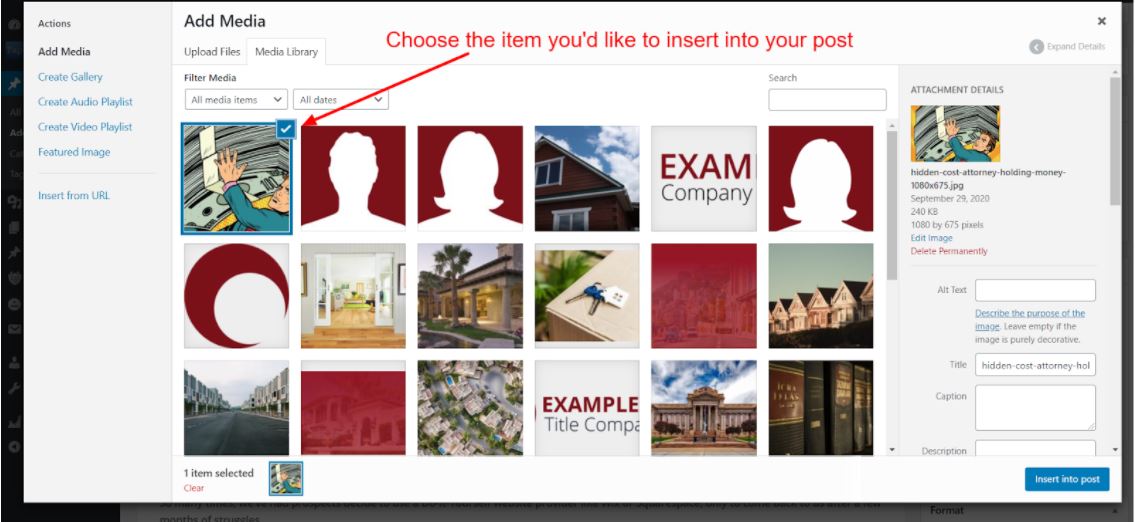
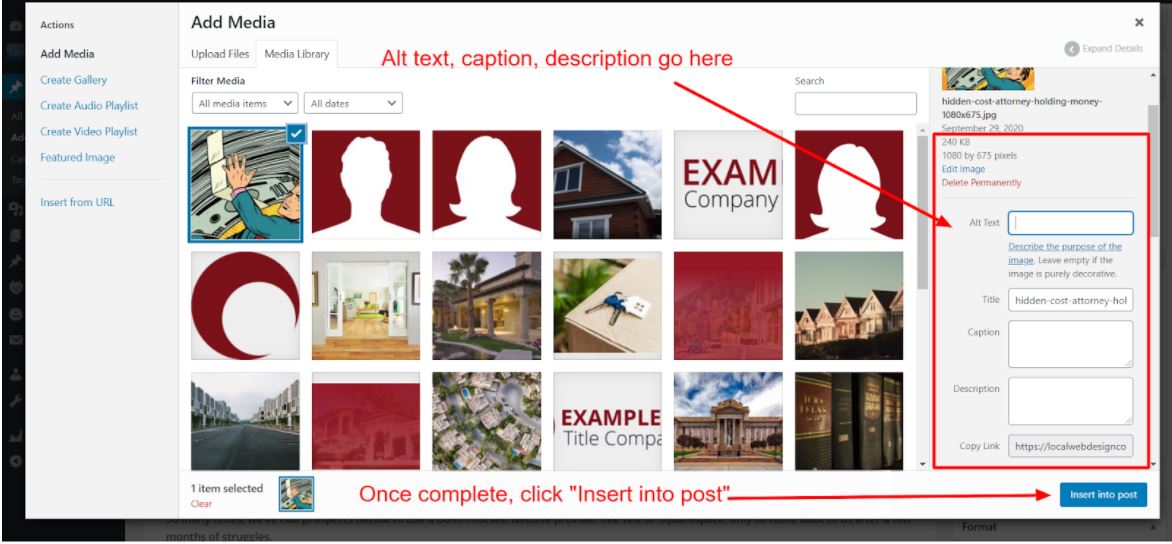
Choose the image you’d like to insert into your post, and add any captions, alt text, or descriptions on the right side.
Click “Insert into post”:
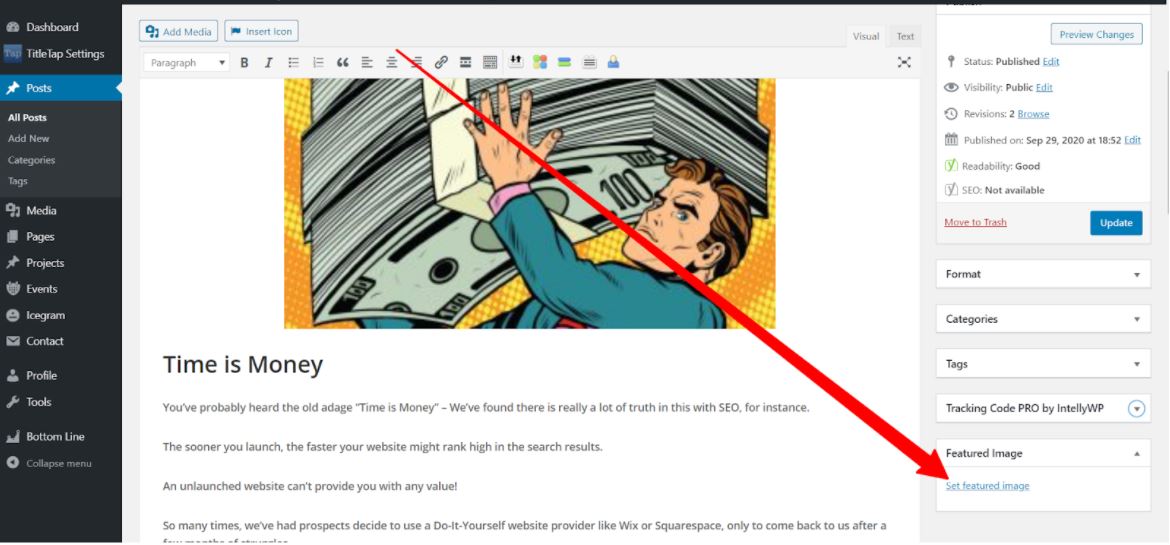
If you’d like to include a “Featured Image” for your post (meaning that it will be the main photo for this blog post, shown at the top along with your title), you may also do it at this time. On the right sidebar area of your post, near the bottom, there is a link that says “Set featured image” – you will then go through the same process as above to choose an image.
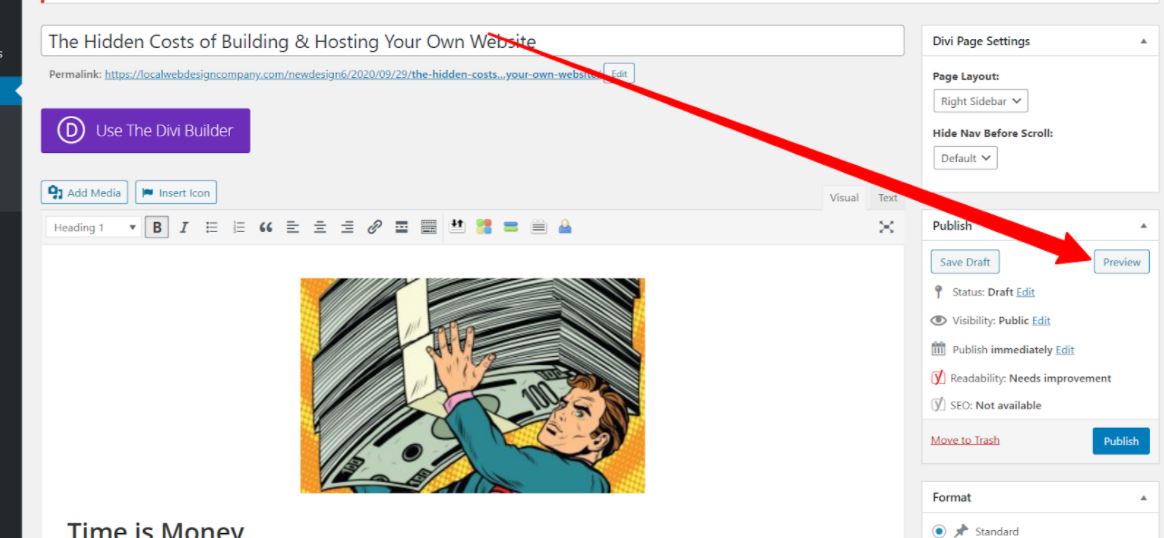
Step 4: Preview your post #
Once you have completed editing, click “Preview” on the right side of the post to verify that it looks the way you want it to.
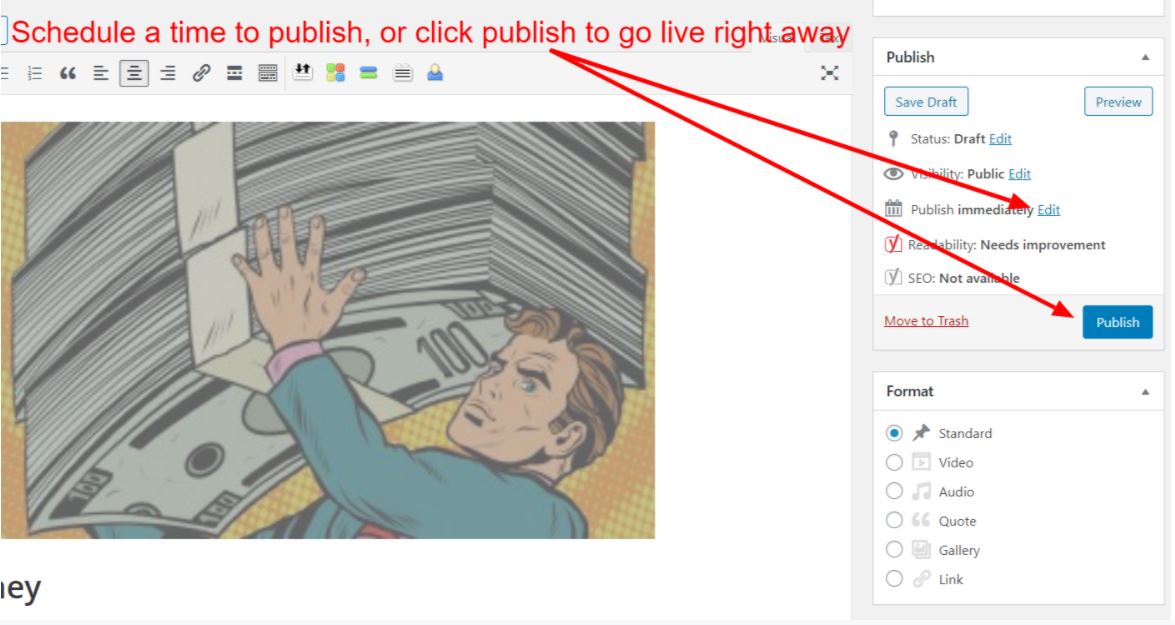
Step 5: Publish Your Post #
When you are ready to publish your post, you can either schedule it for a later date or simply click “Publish” to publish immediately.
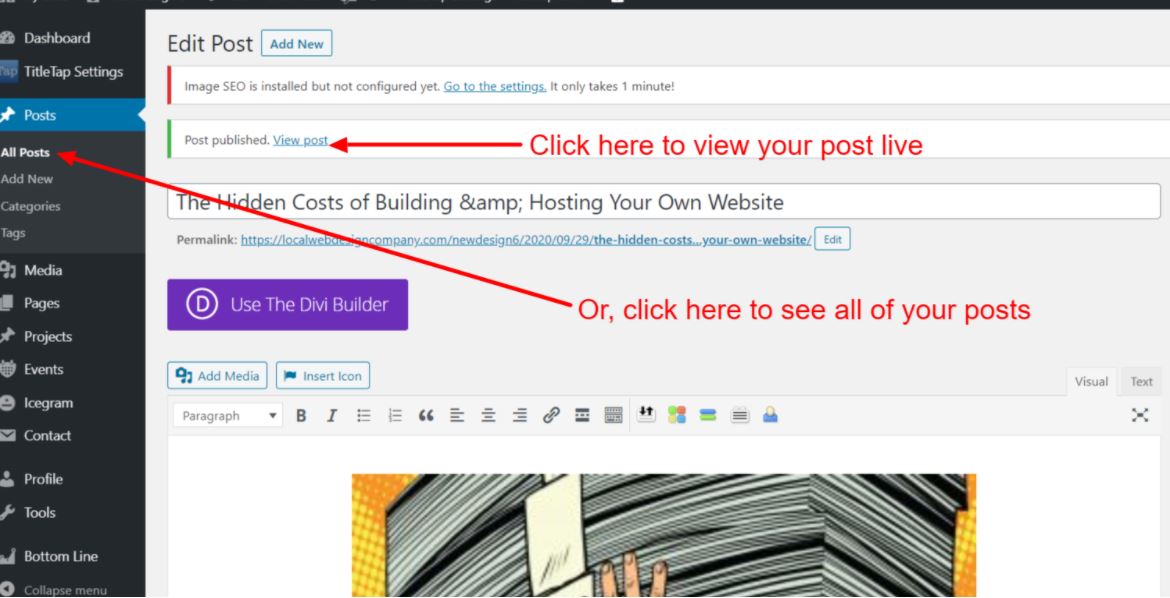
Step 6: Enjoy! #
Once you publish, you are ready to view it live! Click “View post” to see it live on your site. From here, you can also choose “All Posts” to see a list view of all of your posts.
Read and share your post.

If you need further assistance or have questions on any of the information presented here, please feel free to reach out to our Customer Success Team HERE.